What does this do?
It allows you to use the PlantUML language to create technical diagrams directly in your Jira issues. The app adds a panel to Jira issues that is easily shown and hidden by a button at the top of the page.

Adding Diagrams to your Jira issues
Once your Jira administrator has installed the app it will place a “PlantUML Diagrams” button on the issue toolbar. Clicking that button shows the PlantUML Diagrams panel and you can add diagrams by clicking the “Add Diagram” button.
Read on to discover all the options available…
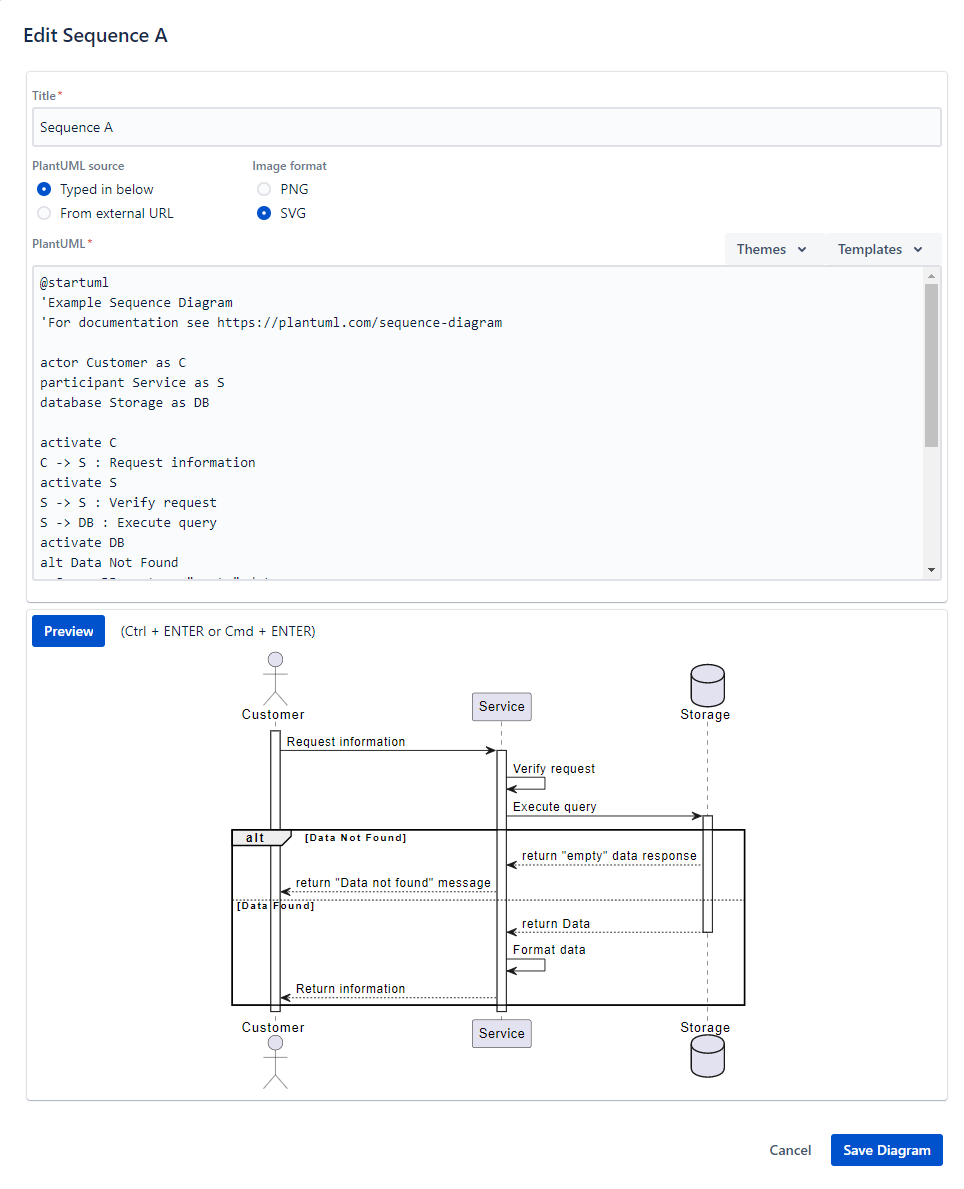
Enter PlantUML into the editor
And have it create an image in your issue. The editor looks like this and allows you to preview what the image will look like.
The app allows you to choose whether it generates PNG or SVG images for each diagram.

Specify a URL
You can alternatively specify a link to some PlantUML via a URL. This could be to Github, Bitbucket, or anywhere else on the internet as long as it is a publicly accessible URL (NB: If using a code repository like Github, ensure you provide the link to the raw content).
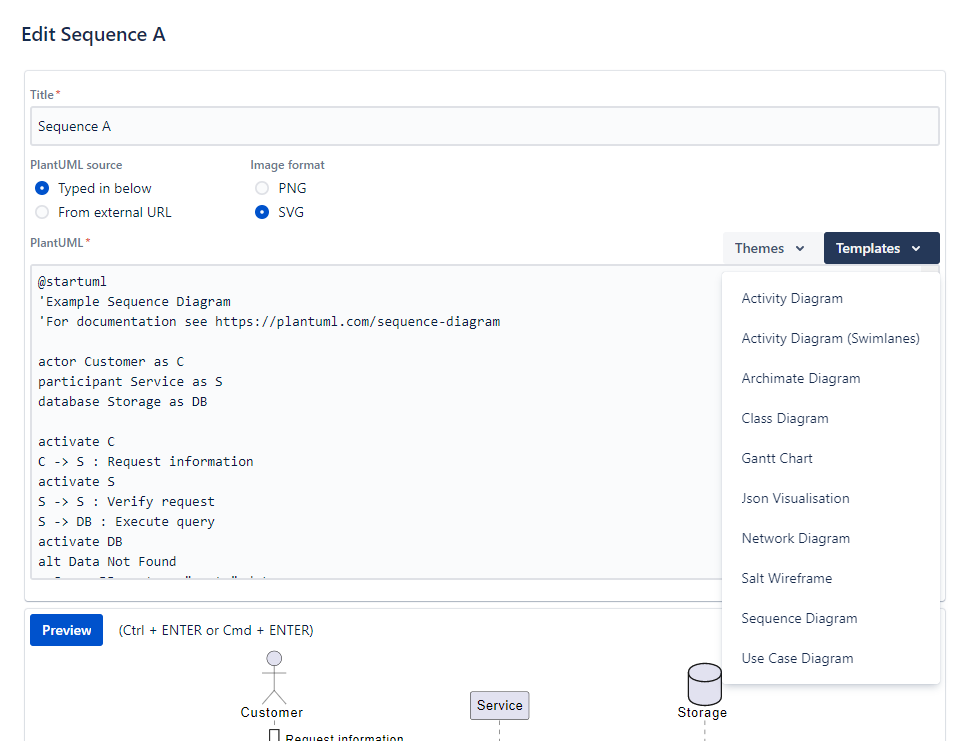
Start with a template
Use one of the supplied templates to generate your diagrams. It’s always easier to start with a structure already in place and then edit it so we make that easy for you! You can also choose from some more interesting themes from the Themes menu too.
The common diagram types are covered:
- Activity Diagram
- Sequence Diagram
- Class Diagram
- and more – see the screenshot

Manage your diagrams
There’s a little menu to manage each diagram – click the 3 dots in the top right of each diagram’s display.
This allows you to:
- Move the diagram up or down (if you’ve added more than one diagram to the Jira issue)
- View it in a fully zoomable popup
- Edit the diagram
- Remove the diagram